Dynamics 365 Business Central: Payroll Processing using Standard System (Processing Payroll) - Pt. 2
Hi Readers,
In Part 1 (Link Pt. 1 - Payroll Setup ) , we did the setups required. In this post, we process a sample payroll for May 2024.
Payroll Processing
Employee
1.Create a purchase invoice and add the employee vendor.
2. A notification will appear at the top of the document, asking if you want to add the recurring lines. This happens because on the Recurring Purchase Lines on the vendor, we set it to Always Ask.
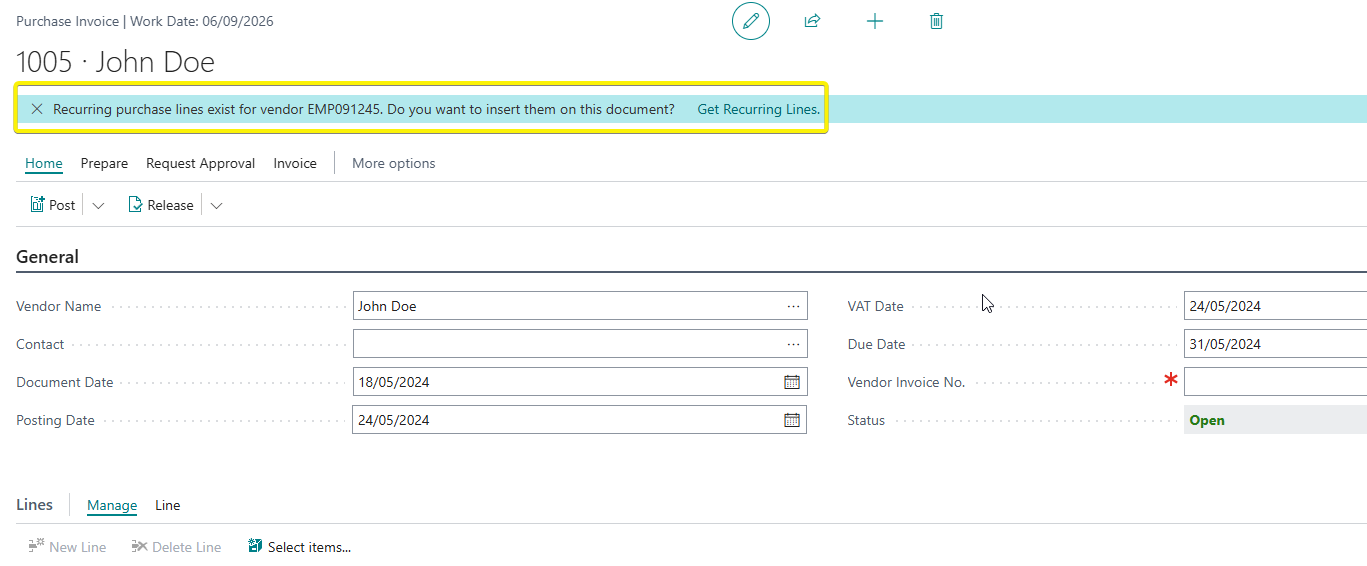
3. Click on Get Recurring Lines and Click on OK.
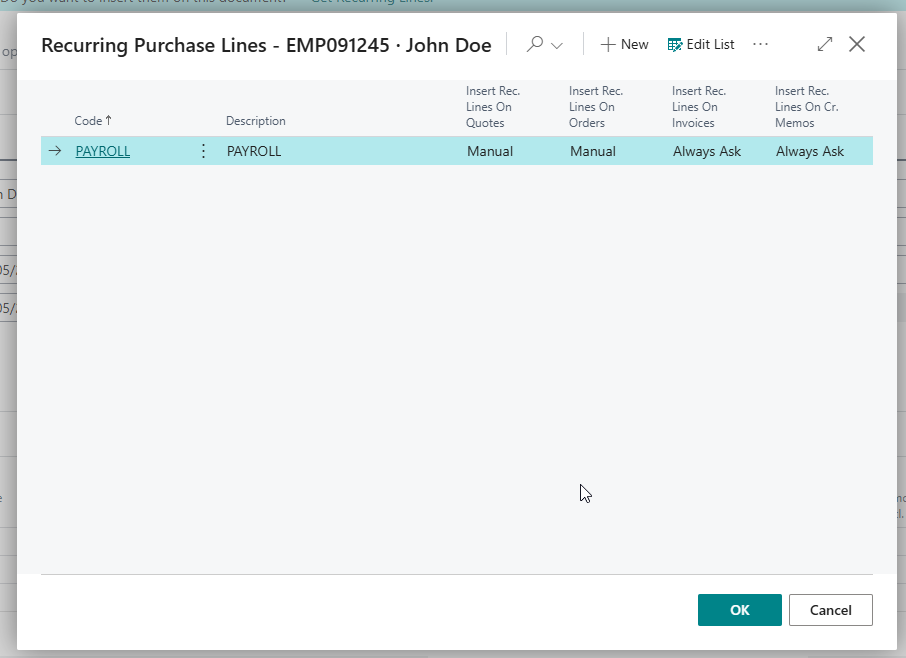
4. The system will populate the Recurring Lines that we setup on the purchase invoice lines.
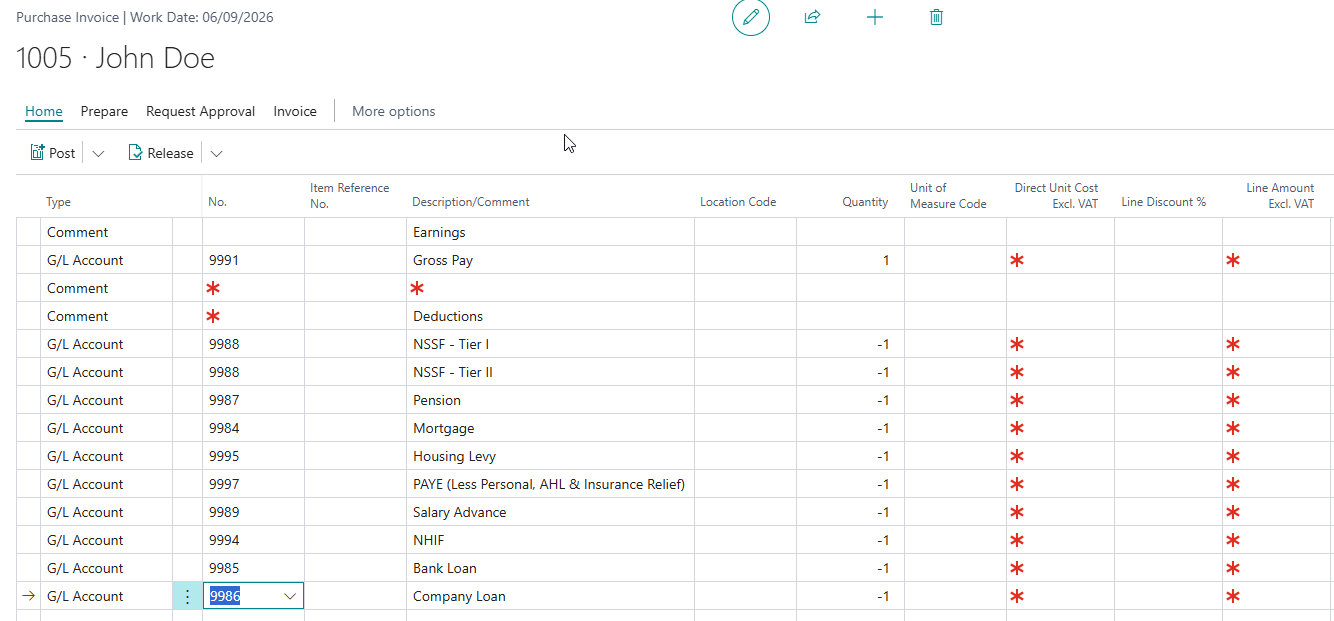
5. For this demo, we will use Aren calculator with a sample salary of KES 75,000. I will fill the relevant earnings & deductions on the respective lines.
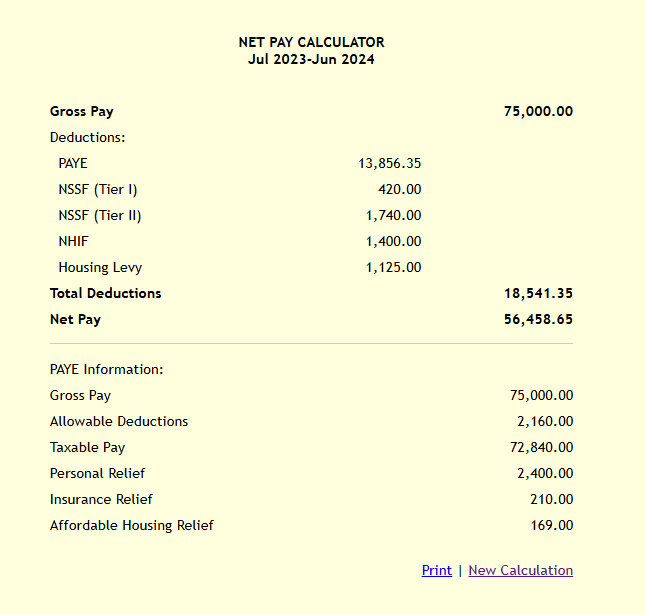
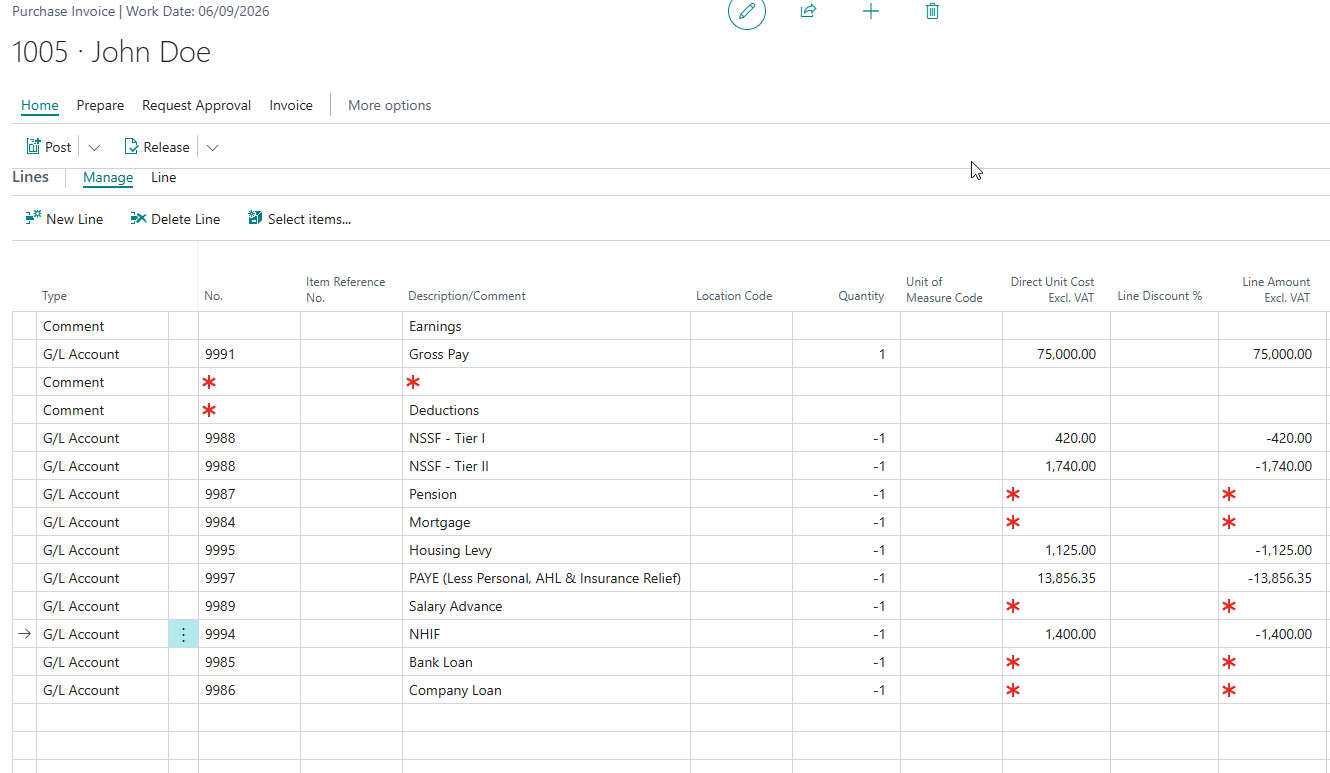
6. If you have other earnings you can make changes to the recurring purchase line to add Allowances, Commisions etc. In the above, some deductions will be left blank but can be filled e.g Bank Loans, Company Loans, Salary Advances
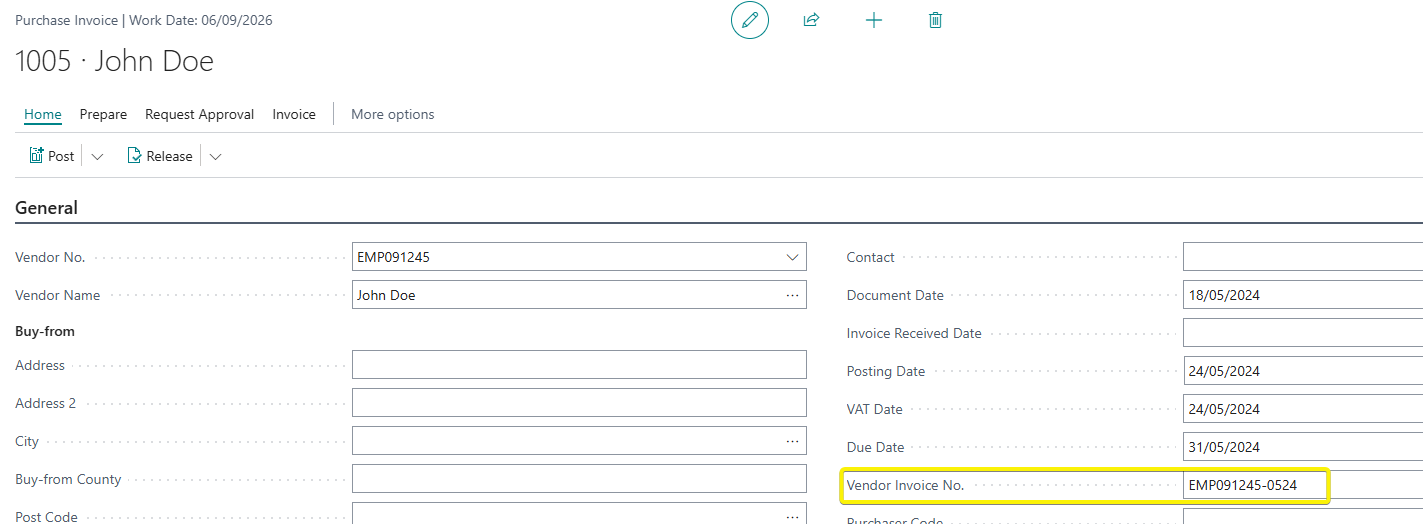
7. Add an Vendor Invoice Number that can be used to identify which payroll run it was e.g - -0524
8. Post the invoice. The following entries will be generated :
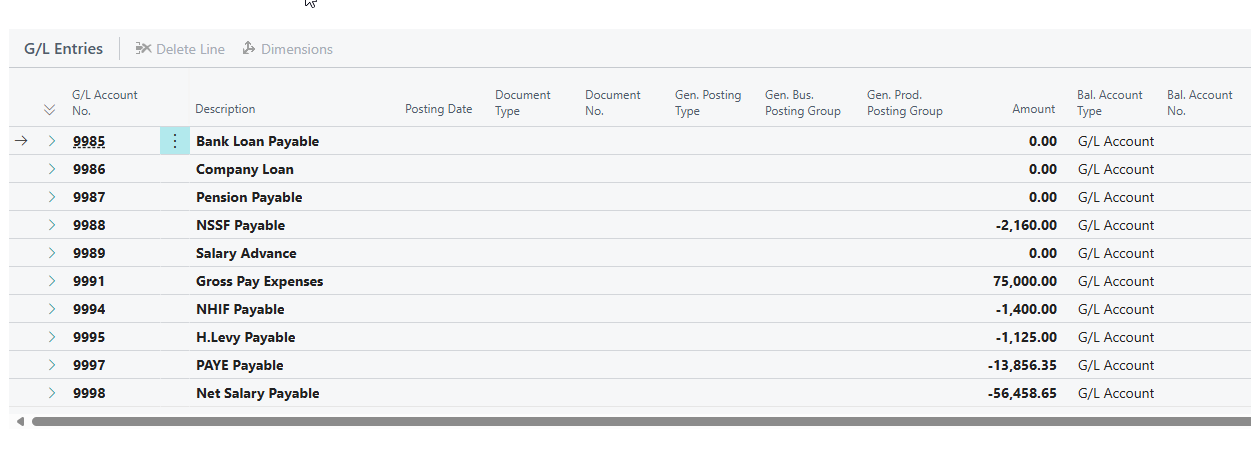
From the above, we can see that our Gross Pay Expenses have been debited and all our statutory accounts have been credited.
How does this work?
All lines in the purchase lines are usually debited if positive and credited if negative thus we can use the purchase invoice to debit our salary expenses and credit our statutory liabilities.
In addition, the net pay of the employer is recorded in the vendor ledger entries as a liability for payment.

Employer
1.Create a purchase invoice and add the employee vendor.
2. A notification will appear at the top of the document, asking if you want to add the recurring lines. This happens because on the Recurring Purchase Lines on the vendor, we set it to Always Ask.

3.The system will populate the Recurring Lines that we setup on the purchase invoice lines. Add the necessary company expenses and liabilities. The total amount of the invoice should be zero as the amounts will be recorded as liability in the statutory accounts.
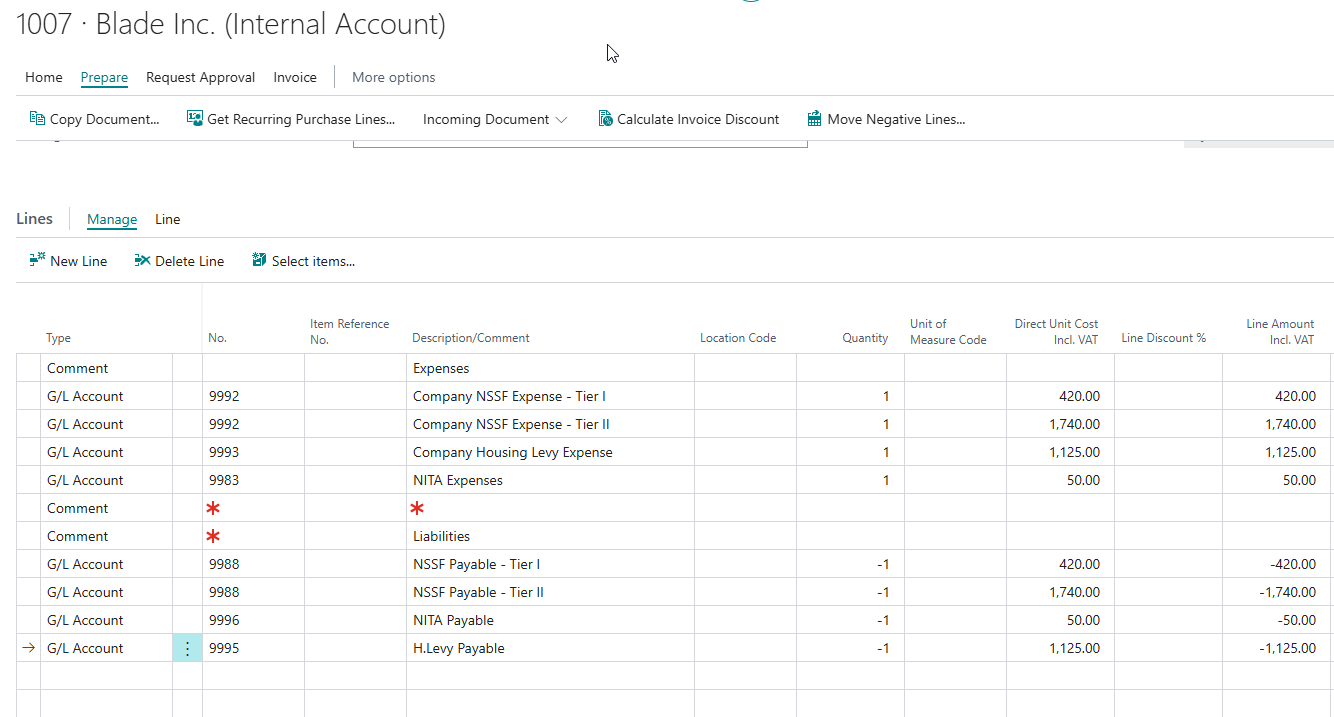
4. Add an Vendor Invoice Number that can be used to identify which payroll run it was e.g COMPANY-0524
5. Post the invoice. The following the entries are generated:

We can note our company amounts have been expensed and also added to the statutory liabilites accounts.
The vendor account maintains a balance of zero also

Lets check how our chart of accounts looks like now.
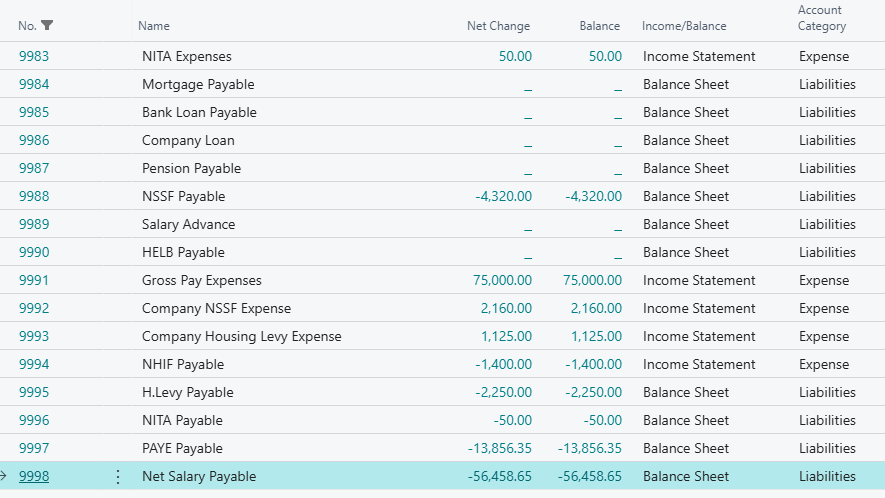
Our accounts seem to be sitting okay : Gross salary expenses, company expenses & statutory expenses.
Payments Processing
For your payments , you can do a normal payment Journal e.g for the employees - Debit the vendor and credit the bank, for the statutories - Debit the liability and credit the bank. Sample full journal shown below.

This would close the salary run process.
PS : The standard system may be a bit limited in achieving most functionalities that a full scale payroll solution would offer. However, the following customizations can be done to improve the process:
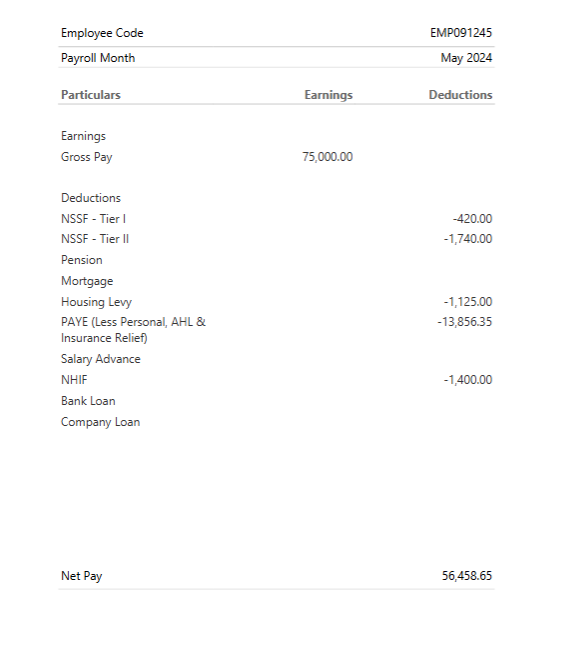
1.You can create a custom layout of the Posted Purchase Invoice to print the payslip for the employee and send via email. See an example. below
2. To ensure security of the payroll data, a small customization might be required to do below:
a. Mark the vendor posting group used for payroll
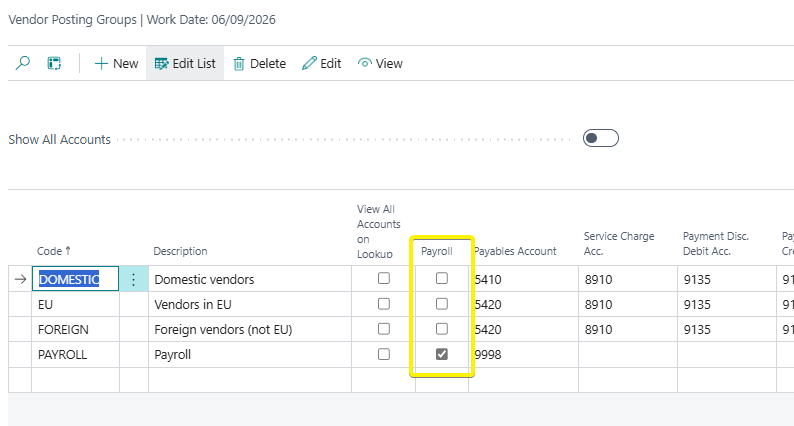
b. Mark all the vendors that have the posting group
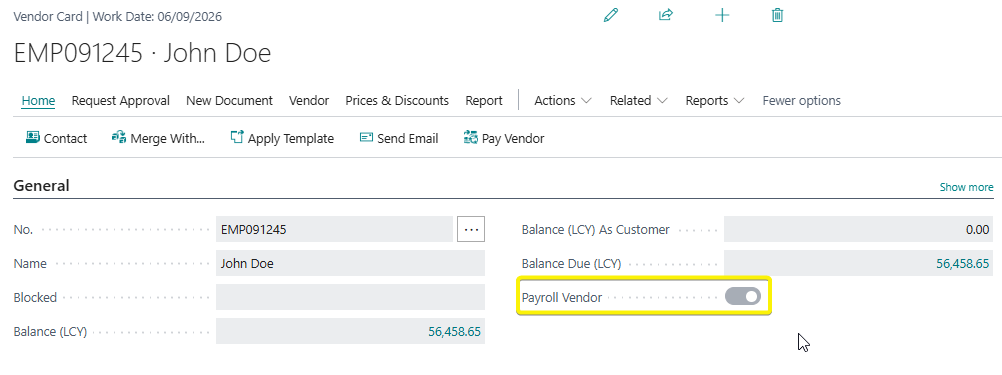
c. Add a permission on User Setup to restrict access based on it.
d. Combine the permission and User Setup and Payroll Vendor boolean to restrict access on various pages : Posted Purchase Invoices, Vendor, General Ledger Entries & Vendor Ledger Entries.
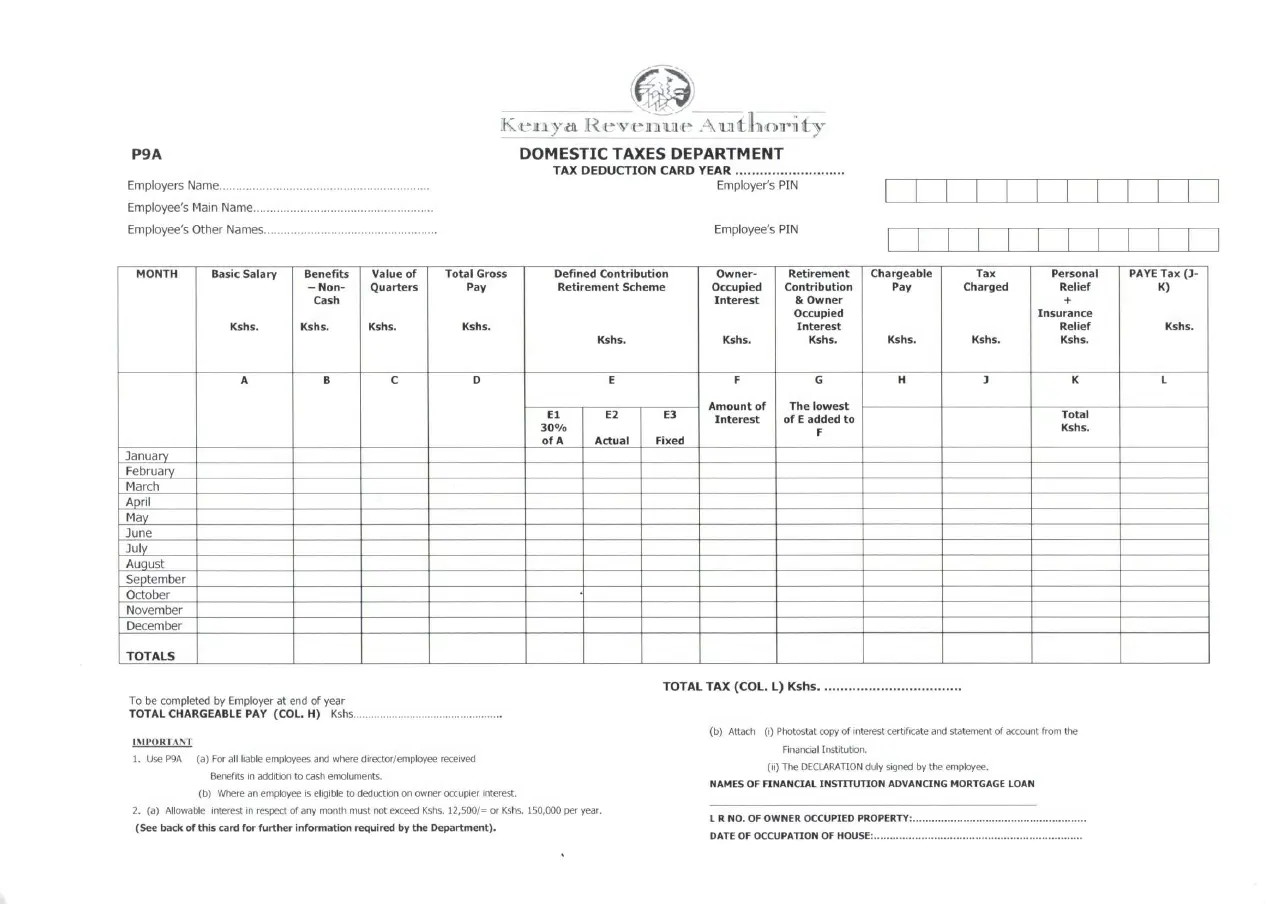
3. You can add Reason Codes and map them to the G/L accounts to build your P9 form
e.g Basic Salary GL - A Reason Code etc
